Quick Start
The Quick Start Guide will help you set up ei8 Avatar quickly with step-by-step instructions.
Follow the installation steps carefully to ensure everything runs smoothly on your system.
📚 Prerequisites
Before installing ei8 Avatar, ensure you have the following:
- Operating System: Windows 10 or higher (64-bit).
- Virtualization: Enabled in BIOS (required for Docker).
- Docker Desktop: Latest version installed and running.
- CPU: At least quad-core (Intel i5 / Ryzen 5 or better recommended).
- RAM: Minimum 8GB (16GB recommended for better performance).
- Storage: At least 20GB of free disk space (SSD recommended).
- Internet: Stable connection for downloading dependencies.
- Admin Privileges: Required for installation and running certain commands.
🚀 Installation Steps
This section provides a step-by-step guide to installing ei8 Avatar and setting it up for the first time.
1️⃣ Enable File Extensions on Windows
Before proceeding, enable file extensions to ensure correct file handling:
- Open the
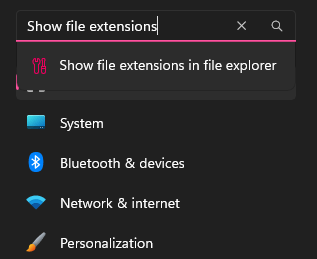
Settingsapp on Windows. - Search for
Show file extensionsin the file explorer and click on the first entry on the dropdown.
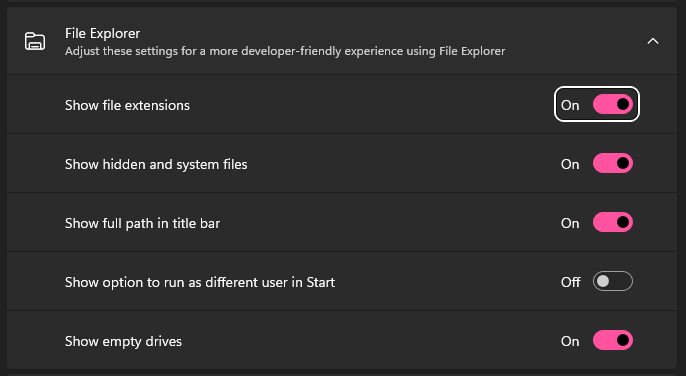
- Turn on the
Show file extensionssetting as shown.
2️⃣ Create Configuration File
- Open
Notepad - Copy and paste the following JSON content:
{
  "server_name": "myserver",
  "avatars": [
    {
      "name": "sample",
      "owner_name": "John Doe",
      "owner_user_id": "john@sample.com",
      "un8y":
      {
        "oidc_authority_url": "https://192.168.1.100.nip.io:65102",
        "client_id": "un8y-sample",
        "requested_scopes": "openid,profile,email,avatarapi-sample,offline_access",
        "base_path": "",
        "certificate_password": ""
      },
      "orchestration":
      {
        "avatar_ip": "192.168.1.100",
        "un8y_ip": "192.168.1.100",
        "avatar_in_port": 65101,
        "un8y_blazor_port": 65103,
        "keys_path": "/e/ei8/keys/sample"
      },
      "event_sourcing":
      {
        "private_key_path": "/C/keys/private.key",
        "in_process_private_key_path": "e:\\ei8\\keys\\sample\\private.key",
        "encryption_enabled": true,
        "encrypted_events_key": ""
      }
    }
  ],
  "destination": "%USERPROFILE%\\Documents\\ei8\\Avatar",
  "template_url": "https://github.com/ei8/avatar-template.git"
}
Note
More sample config files available here.
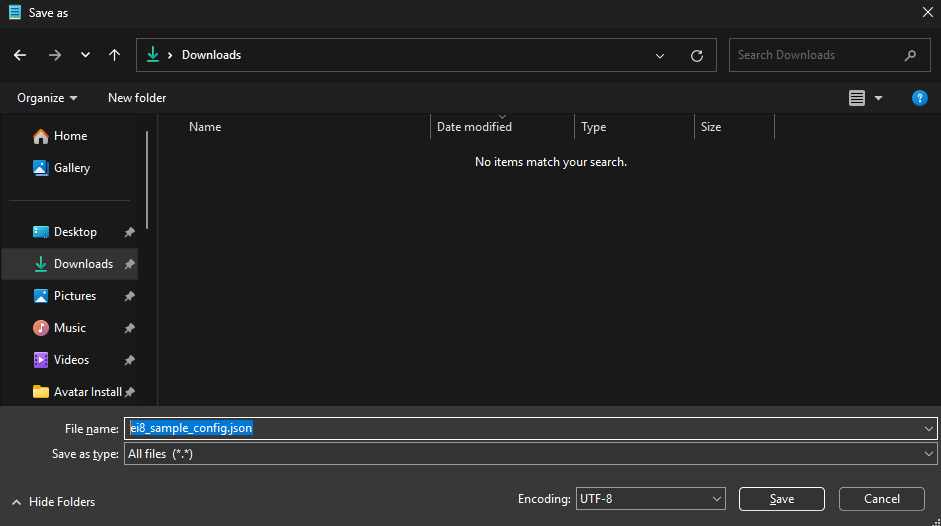
- Save the file as
ei8_sample_config.jsonin yourDownloadsfolder- Make sure to select
All Filesin theSave as typedropdown - Ensure the filename ends with
.jsonand not.txt
- Make sure to select
- If a PFX certificate needs to be generated, run the following in a command prompt:
dotnet dev-certs https -ep [file] -p [password]
Where:
- "file" is the absolute path where the certificate will be generated, eg: "C:\Users\john\Documents\ei8\Avatar\sample". Make sure to use "aspnetapp.pfx" as the name of the certificate file.
- "password" is the certificate password. This should be copied to the JSON config node at "avatars\un8y\certificate_password".
- If using encryption at rest:
- Set JSON config node at "avatars\event_sourcing\encryption_enabled" to true.
- Generate an RSA key pair (using a tool).
- Save the keys in two separate files (ie. public.key, private.key) in an avatar-specific folder (see note below).
- Copy the path in the previous step to the JSON config nodes at (use the format in the sample above, ie. slashes, drive separator etc.):
- "avatars\orchestration\keys_path"
- "avatars\event_sourcing\in_process_private_key_path"
- Update JSON config node at "avatars\event_sourcing\private_key_path" to use the correct relative path of private key file.
- Update JSON config node at "avatars\event_sourcing\encrypted_events_key" to use an AES key that was encrypted using the public key generated in step 5.2.
Note
The avatar-specific keys folder in step 5.3 should ideally be in a secure location that can be physically detached from the server (eg. external USB drive): "e:\ei8\keys\sample"
3️⃣ Download the Avatar Installer
- Download and open the Avatar Installer app.
- On the home page, click on
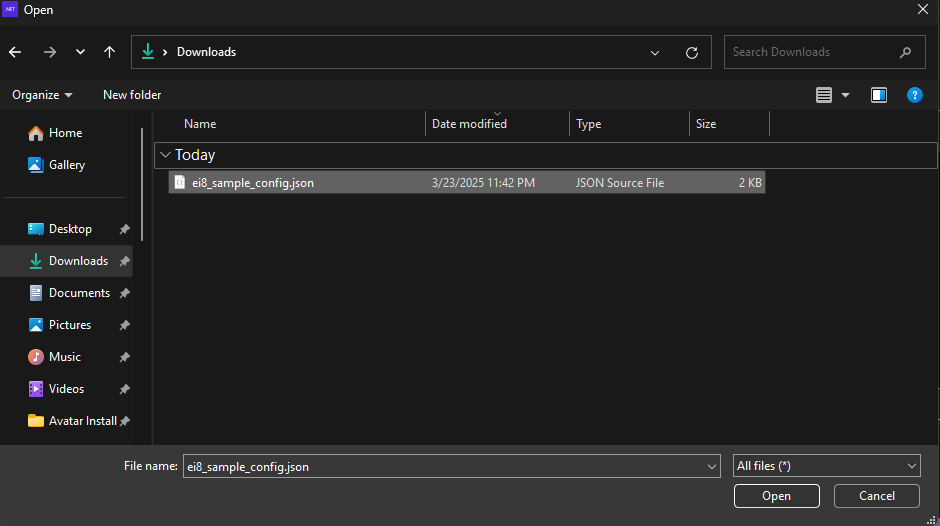
Newand choose a configuration file. - Inside the
Newpage, click onChoose File. Choose the downloadedei8_sample_config.jsonand click open.
- After choosing a configuration file, click
Createand wait for it to finish. - Once completed, you can now run your very own Avatar Server. Your saved files are in
Documents/ei8/Avatar. - If you intend to use Un8y:
- Download the applicable plugins version.
- Extract its contents to [avatar]\un8y\plugins\
- Copy the PFX file generated earlier into the https folder of the generated avatar folder.
Note
If Avatar is being setup for local testing, ensure that [avatar]\un8y\variables.env > BASE_PATH is set to an empty string.
✅ Next Steps
Now that you have installed ei8 Avatar, you can start configuring and using it.
Check out the User Manual for more advanced settings and customization options.